We all appreciate finding new ways to keep a little more of our hard-earned money. We clip coupons, shop sales, and use loyalty cards. But what if one of the most powerful savings tools was already in your pocket or purse, just waiting to be activated? For many of us, it is. It’s the digital wallet on your smartphone.
You might have heard of services like Apple Pay or Google Pay, perhaps thinking of them only as a convenient way to tap and pay for groceries. While they are wonderfully convenient, that’s just the beginning of their value. Digital wallets are also a treasure trove of hidden discounts, automatic coupons, and exclusive cashback offers that most people completely overlook.
This guide is designed to change that. We will walk you through, step by step, how to transform your smartphone into a smart savings device. We’ll skip the confusing tech jargon and focus on practical, easy-to-follow instructions. By the end of this article, you will not only feel confident using a digital wallet but will also know exactly how to use it to unlock savings you never knew existed.
What is a Digital Wallet, Really?
Before we dive in, let’s get comfortable with what we’re talking about. Think of a digital wallet (also called a mobile wallet) as a secure app on your smartphone that holds electronic versions of your credit cards, debit cards, loyalty cards, and even event tickets or boarding passes.
Instead of carrying a bulky physical wallet, you can carry all that information securely on the one device you likely have with you anyway: your phone. When you’re ready to pay at a store, you simply hold your phone near the card reader. It’s fast, simple, and, as we’ll discuss, remarkably secure.
What You’ll Need to Get Started
The good news is you probably already have everything you need. This process is straightforward and doesn’t require any special equipment.
- A Smartphone: This guide covers iPhones (which use Apple Pay) and Android phones (which typically use Google Pay or Samsung Pay).
- An Internet Connection: You’ll need Wi-Fi or cellular data to set up the wallet and add your cards.
- Your Physical Cards: Have the credit, debit, and store loyalty cards you wish to add handy. You’ll need to enter their details one time during setup.
- A Secure Lock on Your Phone: For your security, digital wallets require you to have a PIN, passcode, fingerprint, or facial recognition set up to unlock your phone. This is a crucial security feature that protects your information.
Part 1: Setting Up Your Digital Wallet Step-by-Step
Let’s get your wallet set up. The process is very similar whether you have an iPhone or an Android phone. We’ll break it down for the most common types.
Step 1: Find Your Wallet App
Your phone almost certainly came with a digital wallet app already installed. You just need to find it.
- For iPhone users (Apple Pay): The app is called Wallet. It’s a black icon with a picture of stacked, colorful cards. It’s installed on every iPhone. If you can’t see it on your home screen, swipe down from the middle of the screen and type “Wallet” into the search bar.
- For Android users (Google Pay): The app is typically called Google Wallet (or sometimes Google Pay). It has a colorful “W” logo. If you don’t see it, you can download it for free from the Google Play Store.
- For Samsung phone users (Samsung Pay): Samsung phones come with Samsung Wallet (or Samsung Pay). It works very similarly to Google Pay but is specific to Samsung devices.
For the rest of this guide, we’ll refer to them generally as your “wallet app,” as the steps are nearly identical.
Step 2: Add Your First Payment Card (Credit or Debit)
Now, let’s add a card. This is the digital equivalent of putting your favorite credit card in your physical wallet. It’s a one-time setup for each card.
- Open your Wallet app. You’ll likely see a welcome screen.
- Look for a “+” sign or a button that says “Add to Wallet” or “Add a card.” This is usually in the top-right corner or prominently displayed in the center. Tap it.
- Select “Debit or Credit Card.” The app will give you a few options. Choose the payment card option to start.
- Scan or Enter Your Card Details. Your phone will ask for permission to use the camera. This is the easiest way: simply position your physical card within the frame on the screen, and the app will automatically read the card number and expiration date. It’s surprisingly accurate! If you prefer, or if the scan doesn’t work, you can choose to “Enter Card Details Manually.”
- Verify Your Information. Double-check that the number and date are correct. You will then be asked to enter the 3- or 4-digit security code (CVV) from the back (or front, for American Express) of your card.
- Agree to the Terms. You will see a screen with terms and conditions from your bank. You must agree to proceed.
- Verify with Your Bank. This is a critical security step. Your bank needs to confirm that it’s really you adding the card. It will usually offer to send you a text message with a one-time code, an email, or have you call them. A text message is often the quickest method. Once you receive the code, enter it into the app to complete the verification.
That’s it! Your card is now securely stored in your digital wallet. You can repeat this process for any other credit or debit cards you’d like to have on hand.
A Quick Word on Security: Is This Safe?
It’s completely normal to feel a bit hesitant about putting your financial information on your phone. However, using a digital wallet is often more secure than using your physical card. Here’s why, in simple terms:
When you add your card, the wallet app works with your bank to create a unique, encrypted digital number for your account. This is called a “token.” When you pay in a store, your phone sends this secure token to the payment terminal, not your actual credit card number. The store never sees or stores your real card details, protecting you from data breaches at that retailer.
Furthermore, to even make a payment, you must first unlock your phone with your face, fingerprint, or PIN. This means that if you were to lose your phone, a stranger couldn’t simply pick it up and start making purchases. It’s a powerful two-layer security system.
Part 2: The Fun Part – Finding and Using Your Savings
Now that you’re set up, it’s time to unlock the real power of your digital wallet: the savings. This is where a little bit of knowledge goes a long way.
Step 1: Actively Look for Wallet-Specific Deals
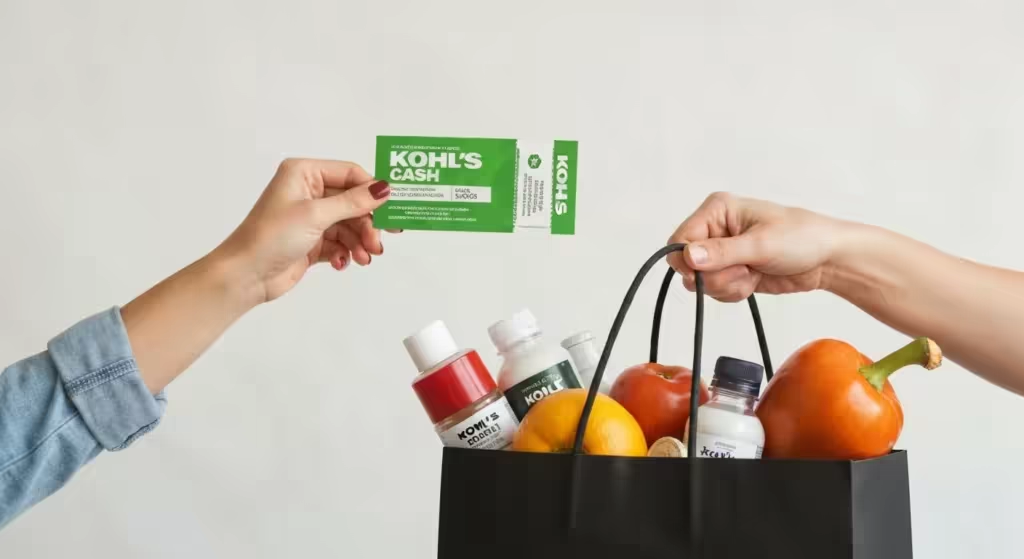
Many retailers and brands offer exclusive discounts and cashback rewards specifically for customers who pay with a digital wallet. They do this to encourage you to use the modern payment method. You just need to know where to find them.
- Inside the Wallet App: Occasionally, Apple Pay and Google Pay will feature special promotions directly within the app. Open your Wallet app and browse around to see if any offers are highlighted.
- Retailer Websites and Apps: This is the most common place to find deals. For example, a store like Panera Bread or Walgreens might have a banner on their website or in their own app that says, “Get $5 off your next order of $20 when you check out with Apple Pay.”
- Email Newsletters: If you’re subscribed to emails from your favorite stores, keep an eye out for these promotions. The subject line might say something like “A special offer for Google Pay users.”
Example in Action: Let’s say you’re planning to buy some new walking shoes from Adidas. Before you check out online, you do a quick search for “Adidas Apple Pay deal.” You might find a limited-time promotion offering 15% off your entire purchase just for using that payment method. By taking 30 seconds to check, you’ve saved real money.
Step 2: Add Your Store Loyalty Cards
This is one of the most convenient and overlooked features. How many times have you gotten to the front of the grocery line only to realize you left your loyalty card at home? Or fumbled through your keychain to find the right little plastic tag for the pharmacy? A digital wallet solves this for good.
Follow the same process as adding a credit card, but this time, look for an option like “Add Loyalty Card,” “Scan Code,” or “Find Your Brand.”
- Open your Wallet app and tap the “+” sign.
- Select “Loyalty Card” or a similar option.
- Search for the store. The app will show a list of popular stores like CVS, Walgreens, Kroger, Safeway, and many more.
- Scan the barcode. Use your phone’s camera to scan the barcode on your physical loyalty card. The app will capture it and create a digital version.
The Savings Magic: Here’s how this saves you money and hassle. When you’re at the checkout, you first tell the cashier you have a loyalty card. Open the card in your wallet app and let them scan it from your phone’s screen. Then, when it’s time to pay, you switch to your credit card in the wallet and tap your phone to the reader. At many modern terminals, the system is even smarter. The payment reader will automatically recognize both your loyalty card and your payment method in a single tap!
Step 3: How to Pay in a Store
Using your digital wallet in a physical store is incredibly simple. You’ll be a pro after your first try.
First, look for one of these symbols at the checkout counter or on the card reader. This indicates they accept “contactless” or “tap-to-pay” mobile payments.
(Imagine an image here showing the contactless payment symbol – a sideways Wi-Fi icon – and logos for Apple Pay, Google Pay, etc.)
Once you see that symbol, you’re ready.
- If you have an iPhone: Double-click the side button (on newer iPhones) or double-click the Home button (on older ones). Your default card will appear on the screen. Glance at your phone (Face ID) or place your finger on the sensor (Touch ID) to authorize the payment. Then, simply hold the top of your phone near the card reader. You’ll feel a slight vibration and see a checkmark on your screen. That’s it!
- If you have an Android phone: Simply unlock your phone using your PIN, pattern, or fingerprint. Then, hold the back of your phone near the card reader. The Google Wallet app will automatically open and complete the payment. You’ll see a checkmark on the screen when it’s done.
You don’t even need to open the app first. The phone is smart enough to know what to do when it gets close to a payment terminal. It’s faster than finding your card, swiping or inserting it, and waiting.
Step 4: How to Pay Online or In an App
This is where digital wallets truly shine in both convenience and security. Have you ever been frustrated trying to type your 16-digit credit card number, expiration date, and address into a tiny form on your phone’s screen? With a digital wallet, that frustration is gone.
When you’re shopping online on your phone or computer, look for the “Pay with Apple Pay” or “Buy with Google Pay” button at checkout. It will be right next to the usual “Pay with Credit Card” option.
- Click the Apple Pay or Google Pay button.
- A small window will pop up showing your default card and shipping information, which it has already stored securely.
- Confirm the payment. On your phone, you’ll simply authorize with your face, fingerprint, or passcode. If you’re on a Mac computer, you might use the fingerprint sensor on your keyboard or confirm on your nearby iPhone.
The purchase is complete. You didn’t have to type in any card details or shipping addresses. Not only is it faster, but it’s also more secure because, once again, your actual card number was never shared with the online merchant.
Part 3: Advanced Savings Strategies for the Savvy User
Once you’re comfortable with the basics, you can use a few extra strategies to maximize your savings. Think of this as graduating to the expert level.
Strategy 1: “Stacking” Your Rewards
This is a powerful concept. “Stacking” means earning rewards from multiple sources on a single purchase. Your digital wallet makes this easy.
Let’s say you have a credit card that gives you 3% cashback on groceries. You also see a promotion where you get a $5 statement credit for making three purchases with Google Pay this month. By adding your 3% cashback card to your Google Wallet and using it to pay for your groceries, you get the best of both worlds:
- You earn your 3% cashback from your credit card company as usual.
- You make progress toward the $5 credit from the Google Pay promotion.
- Your grocery store loyalty card, also in the wallet, gives you the instant sale prices.
You have successfully stacked three different types of savings on one transaction without any extra effort at the register. Always choose to put your highest-earning rewards card in your digital wallet to make it your default payment method.
Strategy 2: Simplify Your Commute with Transit Cards
Many public transportation systems—like the subways in New York City, Chicago, or the San Francisco Bay Area—now allow you to pay by simply tapping your phone. You can add your city’s transit card (like a Clipper card or Ventra card) directly into your digital wallet. You can even set it to “Express Mode,” which means you don’t even have to unlock your phone to tap and pay at the fare gate.
The savings here come from both time and money. It’s much faster than waiting in line to refill a physical card, and you can often reload your transit card directly in the app, sometimes with special promotional offers that aren’t available at the physical ticket machines.
Tips for Success and Best Practices
To get the most out of your new financial tool, keep these simple tips in mind.
- Start with One Card: Don’t feel you need to add every card you own at once. Start by adding your most-used credit or debit card. Get comfortable using it for a few purchases. You can always add more later.
- Set Your Favorite Card as the Default: If you have multiple cards in your wallet, you can choose one to be the “default” card that pops up automatically when you go to pay. Make this your primary or highest-rewards card for maximum benefit.
- Check for Offers Periodically: Make it a habit to peek at your wallet app or your favorite retailers’ websites once a month to see if new mobile payment deals have appeared.
- Keep Your Phone’s Software Updated: Your phone’s manufacturer regularly releases software updates that include important security enhancements. Always accept these updates to ensure your device and your wallet app are as secure as possible.
Troubleshooting and Frequently Asked Questions (FAQs)
It’s smart to have questions. Here are answers to some of the most common ones we hear.
What if I lose my phone? Is my money gone?
This is the most important question, and the answer should be very reassuring. If you lose your phone, your money is not gone. Remember, a thief cannot use your digital wallet without your PIN, face, or fingerprint. Your first step should be to use your device’s “Find My” feature (Find My iPhone for Apple, Find My Device for Google) from any web browser. You can immediately put the phone in “Lost Mode,” which locks it down and suspends your cards in the wallet. You can also remotely erase the device completely, which removes all your personal data, including the wallet information. Your physical cards are unaffected and can still be used.
Is it really more secure than my plastic card?
Yes, in most scenarios. As we covered, the system uses secure “tokens,” so your real card number is never exposed to merchants. This protects you from having your card number stolen if a store’s system is hacked. With a physical card, if a dishonest employee or a skimmer device captures your number, it can be used fraudulently. That risk is virtually eliminated with a digital wallet.
What if the payment doesn’t go through?
This is rare, but it can happen. First, try holding your phone over the reader again, perhaps at a slightly different angle. Make sure you’ve properly unlocked your phone. If it still fails, the issue is likely with the store’s terminal, not your phone. You can always use your physical card as a backup. There is no harm in trying to tap-to-pay first.
Do I need an internet connection to pay in a store?
No! This surprises many people. Your phone stores the secure payment tokens directly on the device. You do not need a Wi-Fi or cellular connection to make a payment in a store. You can be in a basement-level supermarket with no signal and your tap-to-pay will work perfectly.
Can I use my digital wallet everywhere?
You can use it at any retailer that displays the contactless payment symbol. In the United States, this is now the vast majority of major retailers, grocery stores, pharmacies, restaurants, and vending machines. While some smaller mom-and-pop shops may not have updated terminals yet, acceptance is growing every day.
A New Tool for a Savvy Saver
Embracing new technology can sometimes feel daunting, but the benefits of using a digital wallet are too great to ignore. It’s more than just a futuristic way to pay; it’s a practical tool that enhances your security, simplifies your life, and, most importantly, puts money back in your pocket.
By following the steps in this guide, you have empowered yourself with the knowledge to turn your smartphone into a financial ally. You can now step up to any checkout counter with confidence, knowing you’re paying in the most secure way possible while automatically taking advantage of deals and discounts you might have otherwise missed.
So go ahead, open that Wallet app. Add your first card. The next time you’re at the store, give it a tap. You might be surprised at how simple—and rewarding—it truly is.